For businesses with limited space, a waitlist ensures that interested clients always have a chance at getting into a course, in addition to making sure high-demand courses stay full even if someone cancels. Unlike standard single-visit classes, Courses require an upfront payment for the entire series, which impacts how the waitlist functions.
In This Article
Who Can Use This Feature?
- Pike13 Plans: ✅Premium, ✅Advanced, ✅Essential
- User Roles: ✅Primary Owner, ✅Owner, ✅Manager, ❌Staff, ❌Limited Staff
Enabling Course Waitlists
You must enable the waitlist specifically for each course service.
-
Go to Settings > Services.
-
Select the Course you wish to modify.
-
Click the Details tab.
-
Scroll to the Waitlist section and click Edit.
-
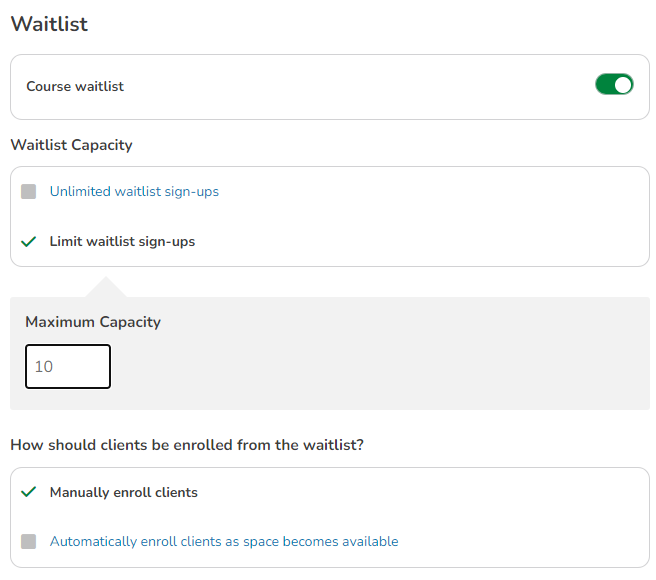
Toggle On: Switch the "Enable Waitlist" button to Green.
-
Capacity:
-
Unlimited: Any number of people can join the line.
-
Limited: Enter a maximum number (e.g., "Max 5 people on waitlist").
-
-
Enrollment Type:
-
Automatic: As soon as a spot opens, the system moves the top person into the course.
-
Manual: A staff member must approve the move.
-
-
Time Window (Automatic Only): If you chose Automatic, set how many hours before the event the auto-fill stops (e.g., "Stop auto-enrolling 2 hours before start").
-
Click Save.
Adding Clients To A Waitlist
If a course is fully booked, you can add a client to the standby list.
-
Go to the Schedule and select the Course.
-
Click Add Clients.
-
Since the course is full, select Join Waitlist.
-
Click Next.
-
Search for and select the client(s).
-
Click Finish.
-
Notify: Choose whether to send an email notification to the client confirming they are on the list.
-
Click Finish.
⚠️ Important: Payment Requirement
Because Courses require an upfront fee, clients must have a payment method on file to join the waitlist via the Client App or Website.
-
Automatic Enrollment: If a spot opens, the client is automatically enrolled and their card on file is automatically charged the course fee.
Moving Clients From Waitlist To Enrolled
If a spot opens up, you can fill it manually or let the system do it.
Automatic Enrollment:
If enabled, the client at the top of the list is automatically moved to "Enrolled" and charged if a spot opens before the cutoff time.
Manual Enrollment:
-
Go to the Schedule and select the Course.
-
Locate the Waitlist section on the roster.
-
Click the Up Arrow icon next to the client's name.
-
Payment: The client must pay the course fee to finalize enrollment. Once the purchase is complete, they will move to the "Enrolled" list.
Prioritizing the List:
On the course Schedule, you can change who is next in line by clicking the Up/Down Arrows to the left of the client names to reorder the list.
Removing Clients From The Waitlist
-
Go to the Schedule and select the Course.
-
Click the Gear Icon next to the waitlisted client's name.
-
Select Remove from Waitlist.
-
Confirm if you want to notify the client and click Finish.
Best Practice
Enrollment Reports
To see a list of everyone currently waiting for a spot:
-
Go to Reporting > Enrollments.
-
Filter the report: Set [Status] to [Currently on Waitlist].