A Course in Pike13 is a specific type of group service designed for "all-or-nothing" attendance like a camp, workshop or learning series.
-
Payment: Clients pay one full fee upfront to enroll in the entire series. (e.g., $250 to enroll in all 5 days). They cannot pay for a single day or session.
-
No Makeups: If a client misses a day, there is no functionality to reschedule a single visit.
⚠️ Crucial Limitations
-
Client App: Clients cannot enroll in Courses via the Pike13 Client App. They must use a web browser (desktop or mobile) to sign up.
-
Flexibility: If you want to allow drop-ins, makeups, or flexible dates, do not use a Course. Instead, create a Class and use the Bulk Enrollment feature.
In This Article
Who can use this feature?
- Pike13 Plans: ✅Premium, ✅Advanced, ✅Essential
- User Roles: ✅Primary Owner, ✅Owner, ✅Manager, ❌Staff, ❌Limited Staff
Creating a New Course Service
-
Go to Settings > Services.
-
Click + New Service > + New Course Service.
-
Enter the following information:
-
Name of service: This will be seen by staff and clients (e.g., Level 2 Workshop, Summer Camp 5-12)
-
Course Price: The total cost for the entire series (e.g., $250)
- Choose applicable taxes: Select any sales tax that should be applied to the price of the course
- Revenue Category: Used in reporting to track revenue
- Service Category: Grouping for reports and filtering for clients via the website
-
-
Click Finish and begin scheduling a course occurrence.
- Enter the following information:
- Name: name of this specific offering (e.g., Spring 2027 Level 2 Workshop, Summer Camp 2027 Week 1)
- Location: applicable when there are multiple locations in a business
- Start date: the date that the course will begin
- Start time: the time the course will begin on the first day it's offered
- End time: the end time of the course on the first day it's offered
- Repeats: determine if this offering will not repeat (it's a single session) or whether it will repeat weekly or daily for a predetermined number of sessions
- Course offerings must have an end date.
- Instructed by: choose the instructors for this course offering
- Special instructions for enrolled clients: emailed in the confirmation to clients after they are enrolled in the course
- Click Finish.
To add new course occurrences, open the course and click + Course Occurrence.
To add more times to an existing course occurrence, open the course, and click the upcoming course in the Courses tab. Click + Add Another Time to schedule an additional set of times for the same course occurrence (e.g., Monday, Jan 12, 1-4pm and Tuesday Jan 13, 8-11am). You may also click Edit Details to modify the name of this specific occurrence and to include special instructions that only apply to this offering (e.g., "For the January 12-13 workshop, please bring a jacket.").
Configuring Rules and Visibility
Once created, use the tabs to refine the rules:
-
Courses
- See current and upcoming course occurrences
- Create a new Course Occurrence
- See What Clients See: allows a preview of the course as if a client were browsing the web.
- Delete Service: only possible if there are no upcoming course occurrences.
- Details
- Course name: change the name or calendar color of the course as it's seen by staff and clients
- Capacity: the maximum number of clients that can enroll in the course
- Waitlist: enable or disable waitlists for this course, set it to be manual or automatic enrollment and limits on the waitlist size and time until autoenrollment ends
- Course Price: change the price, taxes or revenue category
- Service category: change the service category for reporting purposes and filtering on the calendar
- Applicable rooms: add or remove rooms where this course can be scheduled
- Registration
- Online registration: determine if clients or members may enroll - visitors must create a client profile to enroll
- Member status: determine if enrolling in this course makes the client a member
- Enrollment window for registering online: determine how far in advance of the course clients may enroll in the course
- Special instructions: these are shown in the confirmation email clients receive after enrolling in the course
- Reminders: configure when email reminders about the course are sent to enrolled clients
- Cancellation
- Cancellation policy: add custom text to explain the cancelation policy for this course, such as "No refunds within 6 days of the start date. Contact X to cancel your enrollment."
- Clients cannot cancel a course online. They must contact the business to be removed.
- Cancellation policy: add custom text to explain the cancelation policy for this course, such as "No refunds within 6 days of the start date. Contact X to cancel your enrollment."
- Website Settings
- Visibility: determine if visitors, clients, members or only staff may see this course online
- Service summary: appears on the web for customers to see from the service listings page and in the calendar
- Full service description: appears when customers click for more information on the course
- Show price on homepage?: hiding the price from the homepage will not prevent anyone from enrolling in the course
- Show instructor name?: determine if instructor names should be shown for this course
- Show remaining spaces?: determine if remaining spaces should be shown to website visitors - this can be set to always show or to only show once a certain number of spaces remain
- Rooms: used for scheduling purposes
- Pay Rates
- Create a new pay rate or modify existing ones
- Determine if staff may accept tips for this course
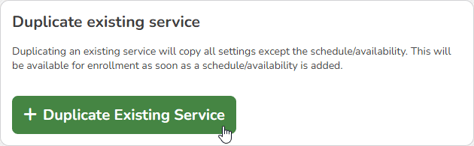
Duplicate Existing Course Services
If you are running "Summer Camp 2025" and it looks just like "Summer Camp 2024," save time by duplicating the service.
- Go to Settings > Services.
- Click + New Service.
- Select + Duplicate Existing Service.
- Choose the course you wish to copy.
- Enter a New Name and click + Create.
- You will be prompted to define the new dates (see Scheduling the Series).