Transform your website into a dynamic booking tool with the Pike13 Appointment Widget. Available with the Premium and Advanced plans, this feature allows your clients to effortlessly schedule appointments straight from your marketing website. It integrates flawlessly with your services, guiding clients from browsing to booking with just a few clicks—saving time and enhancing their experience.
Why the Appointment Widget?
- Easy Booking Process: Clients can choose their preferred appointment, service, or instructor and get instant access to your business's scheduling system.
- Integrated Experience: No redirection or clunky third-party tools—clients are taken directly into your Pike13 workflows, ensuring a smooth transition from website visitor to paying client.
- Fully Customizable: Adjust the widget's design to match your branding, choose the services and staff to display, and control how the booking experience flows.
Unlock Full Potential on Your Website Embedding the Appointment Widget on your marketing site is the key to converting visitors into clients. Whether you're using SquareSpace, WordPress, Wix, or GoDaddy, adding the widget is a breeze with Pike13’s easy-to-use setup.
How It Works
- Set your date range for available appointments—whether it's a specific window or a rolling timeline.
- Choose which locations, services, and staff members to display.
- Customize the button colors to ensure your widget matches your branding seamlessly.
- Preview your widget live, copy the provided code, and place it into your site.
Don’t just settle for visitors on your site—turn them into booked clients with the power of the Pike13 Appointment Widget!
Configuring the Appointment Widget
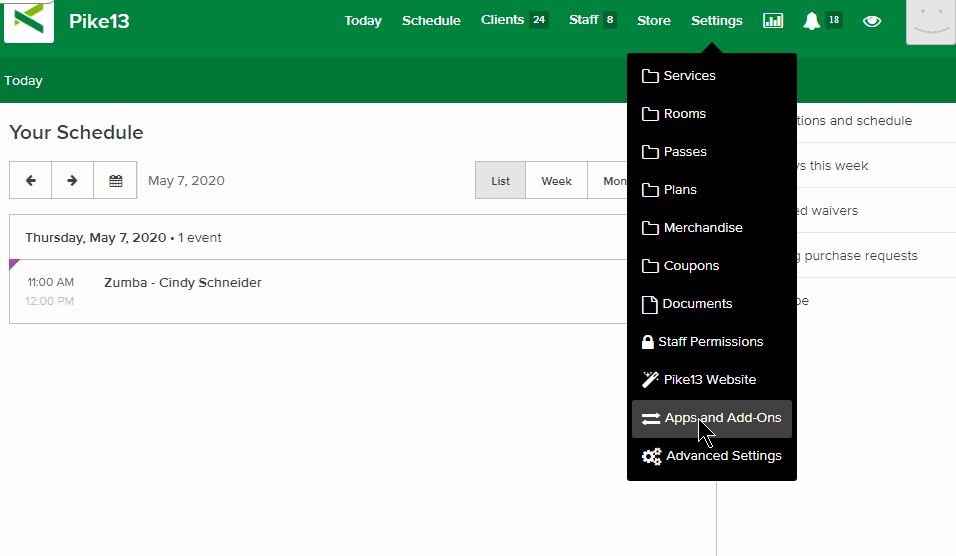
- Go to Settings
- Select Apps & Add Ons
- Choose Embeddable Widgets
- Select the Appointment Widget option
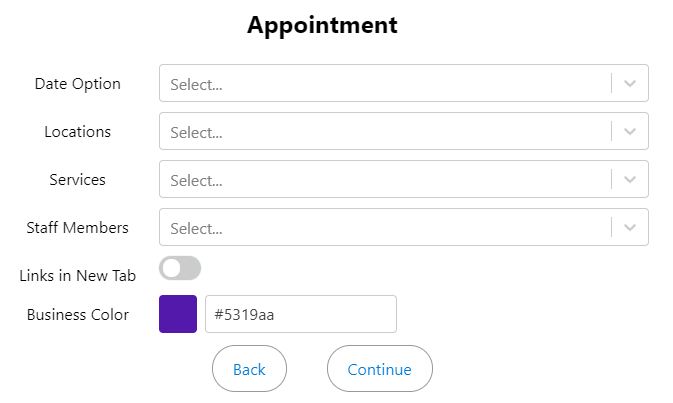
- Select your date range
- Relative Date Range: A constantly updating date range.
- Ex: From: Set by Blackout Window - To: 7 Days From Now
- Absolute Date Range: Specific start date and specific end date
- Relative Date Range: A constantly updating date range.
- Select which Location(s)
- Select your services - you can list all, one, or select multiple services to show in the widget
- Choose staff members if necessary
- Choose whether the client should be taken to a new tab once they click on 'enroll' from the widget
- Confirm or change the color of the buttons on the widget
- Look at the preview to the left to ensure the widget looks correct, then press continue
- Copy the widget code and place it into your marketing site
*The Blackout Window is set up in each appointment service under the Registration tab.
Platform-Specific Instructions:
- SquareSpace: Add a code block to your page, paste the widget code, and hit save.
- WordPress: Use the HTML view to paste your code. Be sure to publish before switching to the Visual tab.
- GoDaddy: Open your page, paste the code in the content block, and save.
- Wix: Make sure your SSL certificate is enabled to use the widget.
For more platforms, simply paste the widget’s HTML code into your page’s source code.
Let Your Website Do the Work
With the Pike13 Appointment Widget, your website becomes streamlined for appointment booking, giving clients the convenience they expect while you focus on growing your business. Add it today and start turning website visitors into paying clients effortlessly!